Mouth Corner Resistance
Strengthen the drooping mouth corner against finger resistance.
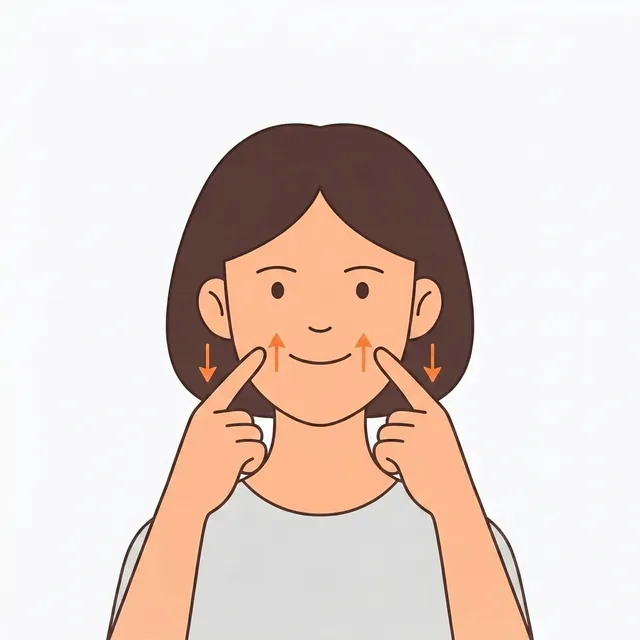
How to do it
- 1
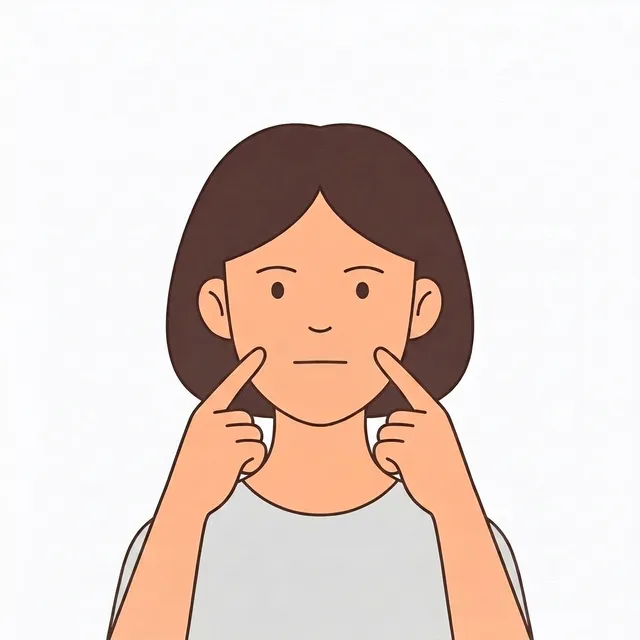
Rest your index fingers lightly on both mouth corners.
- 2
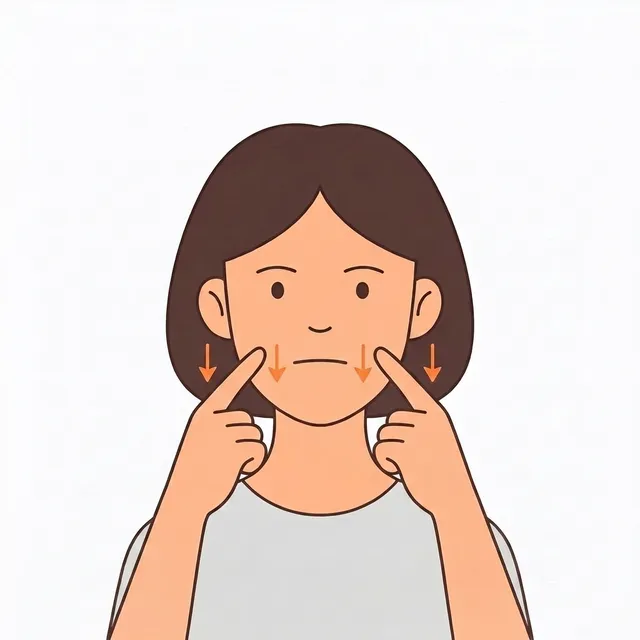
Apply slight downward resistance with the fingers.
- 3
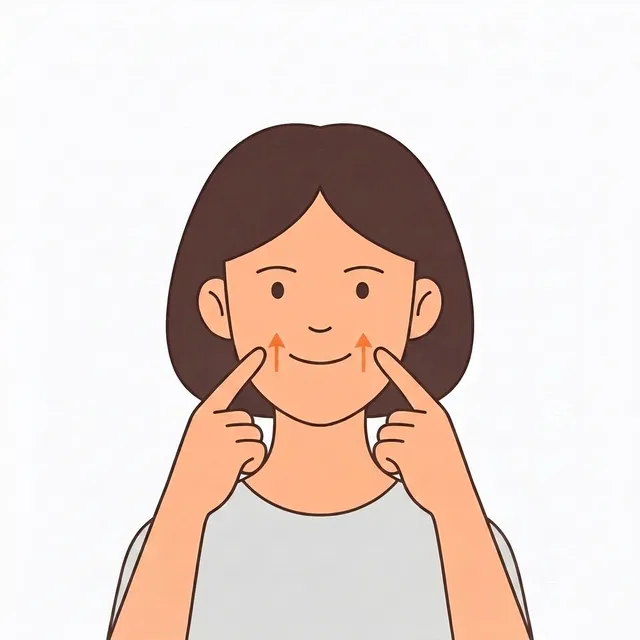
Raise your mouth corners against the resistance.
- 4
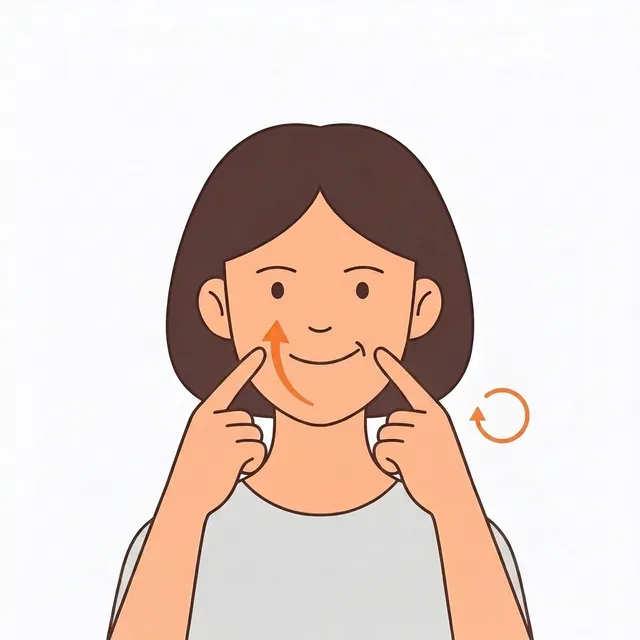
Hold 5 seconds × 10 reps, plus 5 on the drooping side.
Authorship and evidence
Written by: ALYGN operator · content editor
Content reviewed:
Date of editorial content and source review. This does not represent review by a medical professional.
This exercise is self-care information for functional asymmetry that comes from muscle habits. Individual results and timelines vary, and the listed times and repetitions are not a medical prescription.
- Alam et al. (2018): Facial exercise and the appearance of aging ↗
An uncontrolled pilot reporting appearance ratings in 16 completers over 20 weeks. It does not establish asymmetry correction, the effect of an individual movement, this site’s score, or a timeline for change.
Why it works
A drooping corner signals relatively weak lifting muscles on that side. Raising against resistance applies the basic principle of strength training — progressive overload — to the face, targeting the weaker side.
Mouth-corner height is a tug-of-war between lifting and depressing muscles. With age — and with long stretches of a neutral expression — the pull-down side tends to win, and layered with a left-right strength gap, one corner starts to droop. If people say you look upset at rest, or one side looks glum, this balance may have tipped.
The principle is identical to weight training at the gym: repeated lifting against resistance improves the lifting muscles' neural recruitment and strength. Facial muscles are smaller and shallower than limb muscles, so they need no heavy load — just accurate direction and consistency.
Muscles involved
The strengthening targets are the levator anguli oris, which pulls the corner upward, and the zygomaticus major descending diagonally from the cheekbone. Opposing them is the depressor anguli oris pulling downward — this exercise builds the "lifting team" to shift the tug-of-war. Finger resistance means resting lightly on the skin just beside each corner, nothing more.
Common mistakes
- Pressing down hard — keep resistance light and focus on the lifting effort.
- Tensing your neck and jaw — isolate the corner muscles.
- Fast bouncy reps — the 5-second holds are what build strength.
Signs you're doing it right
A workout-style fatigue above the mouth corners — especially on the drooping side — means you are doing it right.
How often and when
Once a day, 5-second holds × 10 reps. As strength work, every other day sustains progress just as well — and if the area feels sore the next day, resting is the right call. Expect strength changes in two to three weeks, and resting-position changes in six to eight or more. Pairing it with the smile-symmetry drill trains strength and usage habit together.
Once it feels easy
When 10 reps feel light, extend holds to 8 seconds or add a solo set for the drooping side. Increasing resistance is the last resort — facial muscles are small, and even slightly more pressure invites the neck and jaw to compensate. Watching the mirror to confirm nothing but the corners moves matters more than intensity.
Frequently asked questions
Q. Will this deepen my nasolabial folds?
The skin folding at the smile line during lifts is the same natural crease that appears when you smile. A minute a day has negligible wrinkle impact — sagging cheek fat and skin aging are the real drivers of nasolabial folds. If concerned, shorten the holds and make up the volume in reps.
Q. Both sides, or just the drooping one?
Do both together, with extra focus on the weaker one. Moving both sides at once is what trains the symmetric movement pattern itself. If the gap is clear, the standard approach is a shared set followed by one bonus set for the drooping side.
Q. Weeks in, my resting face hasn't changed.
That is the normal timeline. Smile symmetry improves first; the at-rest corner position changes last, since resetting a muscle's baseline tone can take over two months. If eight-plus consistent weeks show no change even while smiling, the cause may be skeletal, dental, or skin laxity rather than strength — worth a professional consult.
Cautions
- · Pressing hard can irritate the skin.